Что ставить на фв 4005
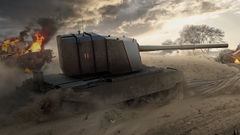
FV4005 STAGE II — ПТ-САУ 10 уровня Британии WOT
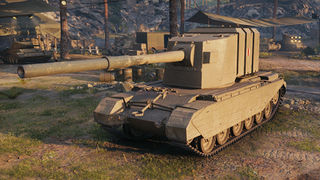
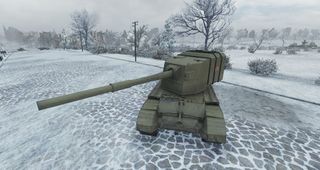
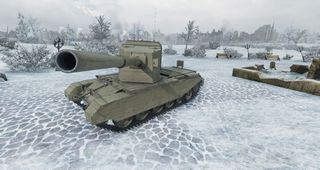
На данный момент, это единственная ПТ-САУ, которая способна наносить до 1800 единиц урона за выстрел, из-за чего и имеет прозвище в игре «бабаха». Британская противотанковая установка может похвастаться не только самым мощным орудием, но и наличием поворотной башни, что значительно упрощает игру на этом классе техники.
ТТХ FV4005 STAGE II
Умения экипажа
Перед тем, как прокачивать перки у экипажа, необходимо изучить сильные и слабые стороны танка. Рекомендуемые умения, которые необходимо поэтапно прокачать экипажу:
| командир |  |  |  |  |
| наводчик |  |  |  |  |
| механик-водитель |  |  |  |  |
| заряжающий |  |  |  |  |
| заряжающий |  |  |  |  |
Конечно, имея огромные габариты, будет спорный вопрос, нужна ли вообще маскировка. Но лучше всё же изучить это умение, так хоть британец не будет засвечен на дальних дистанциях. Далее рекомендуется изучить «боевое братство», чтобы улучшить все характеристики экипажа, в том числе длинную перезарядку. «Радиоперехват» и «орлиный глаз» не менее важны, поскольку FV4005 необходимо будет часто обороняться на базе. Остальные перки можно прокачивать по умолчанию, но всё же рекомендуется изучить умение «снайпер» для вероятности нанесения ещё большего критического урона при попадании.
Оборудование
На британце можно устанавливать не одну комбинацию оборудования, и только игрок сможет выбрать наиболее приемлемое для себя.
 |  |  |
Эта комбинация значительно улучшит характеристики огневой мощи. Досылатель крупного калибра ускорить длинную перезарядку на 10%, а это сокращение практически на 3 секунды. Улучшенная вентиляция усовершенствует характеристики всего экипажа на 5%, в том числе перезарядку. За огромный разовый урон, противотанковая установка расплачивается слабой точностью, поэтому установленные приводы наводки ускорят время сведения на 10%.
Как альтернативный вариант, можно использовать следующие модули:
 |  |  |
Улучшенную вентиляцию можно заменить стереотрубой или просветлённой оптикой, чтобы можно было засвечивать врага на подступах к базе.
Бронирование FV4005 STAGE II
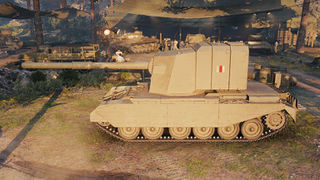
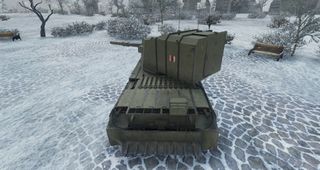
Характеристики бронирования – это самый главный недостаток FV4005. Максимальное значение в корпусе достигает 76 мм в лобовой части. Но вот толщина брони башни по кругу всего 14 мм. При учёте, что башня имеет огромнейшие размеры, враг без проблем будет пробивать танк каждым выстрелом. Причём стоит отметить большую чувствительность к осколочно-фугасным снарядам. Более опытный игрок всегда догадается зарядить фугас, чтобы можно было нанести как можно больше урона и повредить модули с экипажем.
Ни на какие рикошеты не стоит надеяться вообще, поскольку форма башни прямоугольная. Прямые попадания от вражеской артиллерии будут наносить непоправимый ущерб.
Как играть на FV4005 STAGE II
В любом бою на этом «монстре» необходимо в первую очередь думать о личной безопасности, в противном случае риск на уничтожение, в первые же минуты противостояния, увеличится. На каждой карте необходимо использовать индивидуальные тактики. На локациях с большими пространствами нужно всегда смотреть на миникарту и следить за радиусом возможного засвета. Не стоит рисковать и подъезжать ближе к центру. Всегда требуется прятаться за постройками или деревьями, это хоть как-то увеличит время существования в бою. Более опытные игроки активно используют FV4005 на 2-й линии, ведя перестрелки с союзными тяжёлыми танками, но для этого необходимо знать все тонкости карт и тактики. Для простого игрока лучше использовать режим кустовой ПТ-САУ, хоть это будет и сложно делать при её габаритах. Рекомендуется всё же прокачать маскировку экипажу, нанести камуфляж и установить маскировочную сеть. Так, на дальних расстояниях, противнику сложнее будет засечь британца. После выстрела всегда нужно быстро скрываться из прострела, лучше всего за постройками, чтобы можно было защититься и от артиллерии. В городских картах артиллерия не страшна, но и применить противотанковую установку на дальних расстояниях будет сложно. Вот там и придётся идти на риск, и ехать вместе с ТТ.
В общем, FV4005 довольно колоритная противотанковая установка. Эта машина имеет мощнейшее в игре 183 мм орудие, которое способно наносить большое количество урона, но огромный силуэт и абсолютное отсутствие бронирования, делают эту ПТ-САУ самой лёгкой целью в игре. На городских картах будет всё же более комфортно, поскольку можно всегда спрятаться за домами и постройками, а выезжать только для выстрела. Причём это будет удобно делать, заранее повернув башню в нужном направлении.
Достоинства и недостатки
| Достоинства | Недостатки |
| разовый урон | бронирование корпуса |
| бронепробитие всеми снарядами | бронирование башни |
| удельная мощность двигателя | большие габариты |
| вертикальное склонение орудия | максимальная скорость |
| поворотная башня | скорость сведения |
| радиус обзора | разброс орудия |
| время перезарядки | |
| чувствительность к осколочно-фугасным снарядам |
Заключение
Игровой процесс на FV4005 довольно сложный, поскольку характеристики танка слишком колоритные. Данная противотанковая установка не имеет схожести ни с одним танком в игре, поэтому пройдя ветку британца, придётся осваивать эту технику с нуля. Но огневая мощь перекрывает все недостатки ПТ-САУ. Ведь как приятно наносить урон противнику, не выцеливая слабых зон. Несомненно, каждый игрок должен испытать этого монстра в деле. Поначалу будут сплошные «сливы», но со времен можно будет бить рекорды по нанесённому урону и считать взорванные боеукладки вражеских танков.
Видео обзоры FV4005 STAGE II:
Блокировка интернет-ресурсов на территории Украины
Стала доступна предзагрузка обновления 1.10.1.1 WOT
Инвайт-код для WOT на сентябрь 2018 [7 дней према, 500 голды и премиум танк Т-127]
FV4005 Stage II
FV4005 Stage II
6,100,000  Cost Cost |
| 1850 370 HP Hit Points |
| 51.01/54 22.19/54 t Weight Limit |
| 950 950 hp Engine Power |
| 32/8 km/h Speed Limit |
| 26 26 deg/s Traverse |
| 18.62 42.81 hp/t Power/Wt Ratio |
| Yes Yes Pivot |
Shell Cost
Reload Times
Nominal: 30 s
50% Crew: 37.16 s
75% Crew: 32.45 s
100% Crew: 28.77 s
Rammer: 25.89 s
Vents: 28.14 s
Both: 25.32 s
Both and BiA: 24.77 s
Both and Max Crew %: 23.74 s
See Crew, Consumables, or Equipment for more information.
Reload Times
Nominal: 30 s
50% Crew: 37.16 s
75% Crew: 32.45 s
100% Crew: 28.77 s
Rammer: 25.89 s
Vents: 28.14 s
Both: 25.32 s
Both and BiA: 24.77 s
Both and Max Crew %: 23.74 s
See Crew, Consumables, or Equipment for more information.
Using Shell Type 1 (1150 Damage):
Theoretical Damage Per Minute
Nominal DPM: 2300
50% Crew: 1851.5
75% Crew: 2127.5
100% Crew: 2403.5
100% Crew
Vents: 2461
Rammer: 2668
Both: 2725.5
Both and BiA: 2794.5
Both and Max Crew %: 2909.5
Advantageous Damage Per Minute
First-shot DPM: 3450
50% Crew: 3001.5
75% Crew: 3277.5
100% Crew: 3553.5
100% Crew
Rammer: 3818
Vents: 3611
Both: 3875.5
Both and BiA: 3944.5
Both and Max Crew %: 4059.5
See here, here, or here for more information.
Using Shell Type 2 (1750 Damage):
With wholly penetrating hits
Theoretical Damage Per Minute
Nominal DPM: 3500
50% Crew: 2817.5
75% Crew: 3237.5
100% Crew: 3657.5
100% Crew
Vents: 3745
Rammer: 4060
Both: 4147.5
Both and BiA: 4252.5
Both and Max Crew %: 4427.5
Advantageous Damage Per Minute
First-shot DPM: 5250
50% Crew: 4567.5
75% Crew: 4987.5
100% Crew: 5407.5
100% Crew
Rammer: 5810
Vents: 5495
Both: 5897.5
Both and BiA: 6002.5
Both and Max Crew %: 6177.5
See here, here, or here for more information.
Using Shell Type 3 (1750 Damage):
With wholly penetrating hits
Theoretical Damage Per Minute
Nominal DPM: 3500
50% Crew: 2817.5
75% Crew: 3237.5
100% Crew: 3657.5
100% Crew
Vents: 3745
Rammer: 4060
Both: 4147.5
Both and BiA: 4252.5
Both and Max Crew %: 4427.5
Advantageous Damage Per Minute
First-shot DPM: 5250
50% Crew: 4567.5
75% Crew: 4987.5
100% Crew: 5407.5
100% Crew
Rammer: 5810
Vents: 5495
Both: 5897.5
Both and BiA: 6002.5
Both and Max Crew %: 6177.5
See here, here, or here for more information.
With 50% Crew: 0.52 m
With 75% Crew: 0.454 m
With 100% Crew: 0.403 m
With BiA: 0.394 m
With BiA and Vents: 0.385 m
Maximum possible: 0.369 m
For more details, see Crew
With 50% Crew: 0.52 m
With 75% Crew: 0.454 m
With 100% Crew: 0.403 m
With BiA: 0.394 m
With BiA and Vents: 0.385 m
Maximum possible: 0.369 m
For more details, see Crew
With 50% Crew: 4.583 s
With 75% Crew: 4.002 s
With 100% Crew: 3.548 s
With GLD: 3.225 s
With BiA: 3.47 s
With BiA and Vents: 3.394 s
With both and GLD: 3.086 s
Maximum possible: 2.958 s
For more details, see Crew or Equipment
With 50% Crew: 4.583 s
With 75% Crew: 4.002 s
With 100% Crew: 3.548 s
With GLD: 3.225 s
With BiA: 3.47 s
With BiA and Vents: 3.394 s
With both and GLD: 3.086 s
Maximum possible: 2.958 s
For more details, see Crew or Equipment
With 50% Crew: 306.4 m
With 75% Crew: 348.2 m
With 100% Crew: 390 m
With Recon and Situational Awareness: 409.7 m
With Coated Optics: 429 m
With Binocular Telescope: 487.5 m
Maximum possible: 558.3 m
For more details, see Skills or Equipment
With 50% Crew: 306.4 m
With 75% Crew: 348.2 m
With 100% Crew: 390 m
With Recon and Situational Awareness: 409.7 m
With Coated Optics: 429 m
With Binocular Telescope: 487.5 m
Maximum possible: 558.3 m
For more details, see Skills or Equipment
With 50% Crew: 589.3 m
With 75% Crew: 669.7 m
With 100% Crew: 750 m
With 100% Signal Boost: 900 m
When affected by 100% Relaying: 825 m
Maximum possible: 1079.2 m
For more details, see Skills or Equipment
With 50% Crew: 589.3 m
With 75% Crew: 669.7 m
With 100% Crew: 750 m
With 100% Signal Boost: 900 m
When affected by 100% Relaying: 825 m
Maximum possible: 1079.2 m
For more details, see Skills or Equipment
The FV4005 Stage II is a British tier 10 tank destroyer.
This tank destroyer project was developed on the basis of the Centurion Mk3 tank in the early 1950s. The vehicle was initially tested with a mechanized ammo rack. However, the ammo rack did not fit the turret, and it was canceled. One prototype was manufactured and underwent trials, but the vehicle never entered mass production.
Wielding the most devastating gun in the game protruding from a massive box turret, the FV4005 Stage II affectionately became known as «Sh*tbarn» or «Doombarn». The FV4005 Stage II was released as an alternative to the FV215b (183). This featured increased mobility and gun handling, while sacrificing surviveability. It has almost no hull armor & a very large paper-thin turret. When the FV215b (183) was removed from the tech tree but kept as a collector’s vehicle, the FV4005 Stage II received a «balancing update» to its gun handling and mobility. In the current state, this means inferior gun accuracy, aiming time, and movement speed to the FV215b (183). At this point one might ask. Why would anyone get this over the FV215b (183) or the FV217 Badger? Well, the FV215b (183) is no longer obtainable, and the FV217 Badger doesn’t have the 183mm cannon with 1750 damage HESH shells, it has a 120mm that does 400 damage respectively. With this monstrous weapon, the FV4005 Stage II is arguably the deadliest support weapon in the game. Try popping out & shooting heavies while they are reloading, or giving the «Thor’s Hammer» of fire support to a pack of protecting mediums. It is a lot less forgiving than the FV215b (183), so patience with aiming and timing of the attack is essential. You will need to keep an eye on the mini-map at all times, if a flank is failing go & lend your massive 183mm gun. The accuracy is extremely unreliable, thus AP shells are ineffective at medium to long range. Using HE (preferably HESH), The medium to long range shots will deal respectable damage, and taking the time to aim for weak spots will melt the HP of any vehicle who was unfortunate enough to be in front of you. If your patience is strong, awareness is keen, and with a little bit of luck, your gun will become the enemies living hell.
The FV4005 Stage II marks the end of its British tank destroyer line.
Modules / Available Equipment and Consumables
Modules
| Tier | Gun | Penetration (mm) | Damage (HP) | Rate of fire (rounds/minute) | Dispersion (m/100m) | Aiming time (s) | Weight (kg) | Price ( ) |
|---|
Engines
| Tier | Engine | Engine Power (hp) | Chance of Fire on Impact (%) | Weight (kg) | Price ( ) |
|---|
Suspensions
| Tier | Suspension | Load Limit (т) | Traverse Speed (gr/sec) | R min | Weight (kg) | Price ( ) |
|---|
Radios
Compatible Equipment


Compatible Consumables
Player Opinion
Pros and Cons
Performance
The FV4005 Stage II is akin to an artillery piece, though without the option for indirect fire. It enjoys absolutely monstrous firepower with all its types of ammunition, especially HESH and HE (a full penetration can reliably destroy a full health Tier 9 tank, and even some Tier 10s!), but pays dearly for it with terrible gun handling, very slow aim time, glacial reload speed and inadequate shell velocity and accuracy.
In terms of survivability, the tank’s healthpool is on the low side for a Tier 10 tank destroyer, and its armor is downright pathetic, being a Centurion hull with a massive, boxy turret that any and all HE rounds in its tier spread can reliably penetrate. Take note to avoid SPG fire as the SPGs of same and bottom tier can oneshot you if their shots directly hit your weak turret.Further complicanting things, the FV’s camouflage is appallingly poor, comparable only to the largest artillery pieces and heavy tanks.
Last but not least, the FV4005 Stage II is a slow tank, with mediocre top speed and horrible reverse speed, as well as mediocre hull traverse and very slow turret traverse.
This is a fully dedicated support vehicle. Given its characteristics, it is best used do deliver devastating hits to enemy tanks while relying on as much cover as possible to minimize return fire. That being said, in the right conditions and with the cover of allies, an FV4005 Stage II that is allowed to make full use of its tremendous gun can be a nightmare to face on the battlefield.
Early Research
No research required, comes elite when bought.
Suggested Equipment

Gallery
Historical Info
Anti-IS QF L4 gun and its variants
In order to meet these requirements, the designers had to find a much more powerful gun than the L1A1. The British didn’t bother with the small stuff & went right up to a caliber of 7.2 inches (183 mm). Using such a powerful caliber was no accident. This new gun was based on the 183 mm BL 7.2 inch Howitzer, which dates back to WWI. Initially, the howitzer had a barrel length of 22.4 calibers, but this was extended to 33.1 calibers. Unfortunately, even this extension was not enough to fight Soviet tanks.
In 1950, work started on the QF L4 gun, the most powerful tank gun in the world. The gun weighed a little under 4 tons & had nearly 87 tons of recoil force. In order to clear the fighting compartment of propellant fumes, the gun had a fume extractor fitted. Only one type of shell was planned for this gun: HESH (High Explosive Squashed Head). Not only is the caliber of the L4 stunning, but also the weight of the rounds. The propellant was separate from the shell, but this didn’t make the loader’s job much easier: the mass of the shell was 72 kg, & the mass of the propellant was 32.8 kg.
On November 9th, 1950, the War Office held a meeting to determine what vehicle this super-powerful gun would be placed on. The meeting resulted in four variants:
A fully armoured fighting machine (effectively a tank) with a fully rotating turret. An SPG with powerful front armour, but a limited traverse angle. An SPG with a fully rotating turret, but thin armour. An SPG without armour. Variant 1/2: FV215
The contract to develop the first variant went to Morris and was later transferred to Vickers-Armstrong. The chassis of the heavy FV200 tank was used, with the suspension from the heavy FV214 Conqueror tank. The project had multiple names: Heavy Gun Tank No.2, Heavy Anti-Tank SP No.2, FV215 Heavy Anti-Tank SP No.2 or simply FV215. The index Heavy Gun Tank No.2 was incorrectly interpreted by historians, resulting in a mythical project called FV215B. In reality, all these indices pointed to the same vehicle armed with the 183 mm L4 gun.
This project combined the first and second variants. Theoretically, the turret could rotate fully, but the gun was limited to firing within a 90 degree arc. The turret was placed in the rear in order to prevent the huge barrel from sticking out too far. The ammunition capacity was only 20 shells. The rate of fire of the tank was supposed to reach 6 RPM. but whoever set that requirement was a hopeless optimist. The size of the turret did not allow for a loading mechanism, and loading that quickly by hand was not possible. Aside from the gun, the tank had two machineguns: one coaxial and one AA machinegun on top of the turret.
The 65 ton vehicle was supposed to accelerate to 31.7 kph. In order to achieve this, the tank would have an 810 hp Meteor Mk.12 engine. As for the armour, it kept changing throughout the development process. The thickness of the upper front plate varied between 125 and 152 mm, the sides were 50 mm thick (plus spaced armour). As for the turret, the specification was only for the front, which was 254 mm (10 inches) thick.
The FV215 Heavy Anti-Tank SP No.2 was not meant to be. Morris was supposed to first build a full scale model and then two prototypes: one for mobility trials and one as a target for armour testing. In June of 1954, Vickers-Armstrong, the new owner of the contract, was given the same task. Development of the SPG continued until January of 1957. At that point, the full scale model and 80% of the blueprints were ready. But, the War Office got its own Khrushchev and the development of the FV215 Heavy Anti-Tank SP No.2 was shut down in favour of ATGMs.
Variant 4: FV4005 Stage I
As for the main subject of this article, the FV4005, work on it started a while later. Interestingly enough, the third variant was rejected outright, and designers went to the unarmoured option. This is linked to the fact that the required rate of fire of 6 RPM was unattainable without a loading mechanism. Vickers-Armstrong decided to not reinvent the wheel and use a loading system similar to the one on the 104 mm QF 127/58 SBT X1 AA gun, better known as Green Mace. The SPG with a 183 mm gun and an autoloader was known as FV4005 Stage I. An altered chassis of the Centution Mk.3 served as the base for the design. A huge trail was added to the rear, lowered during firing, and the front plate received a travel lock for the gun.
After trials that primarily tested stability of the vehicle wile firing, this design was rejected. It was decided that an SPG of this size that was completely devoid of armour was excessive, and even an automatic loader doesn’t make it worth putting crewmen at such a risk. The fully rotating turret was also rather deceptive, as the powerful recoil limited the firing angle of the gun.
Variant 3: FV4005 Stage II
In July of 1955, specifications for a simpler 183 mm SPG were developed, the FV4005 Stage II. The massive automatic loader was discarded, replaced with two loader crewmen. Since even this variant couldn’t carry more than 12 shells, this solution was considered acceptable. The vehicle received a massive turret. The height of the 50 ton SPG was 3.6 meters, making it the tallest vehicle built in Britain.
The turret armour was only 14 mm thick, meaning that it couldn’t reliably protect the crew from even a high caliber machinegun. On the other hand, it was better than nothing. The Stage II also had a coaxial machinegun, which improved its chances against enemy infantry. A large turret was added to the rear of the turret to load ammunition. The creators of the FV4005 Stage II designed a system to rapidly supply ammunition from trucks, which somewhat compensated for the small ammunition capacity. The new turret was still installed on the Centurion Mk.3 chassis with a trail and a travel lock for the gun.
In March of 1956, the FV4005 Stage II underwent trials to determine the stability of the vehicle when shooting. 32 shots were made at various elevations in the first round. At an elevation of 0 degrees, the front of the vehicle moved up to 22 cm, and the rear up to 12 cm. The greatest oscillations were reached at an angle of 3 degrees, when the front moved up to 27 cm and the rear up to 19 cm. The trials were performed without a crew, who were replaced by mannequins. The trials showed that shooting does not injure the crew.
As a result of the trials, a list of improvements was composed, futilely. In August of 1957, the FV4005 program was closed. Various theories exist for why the super-powerful tank destroyer program was shut down. In reality, the reason was the same as with the FV215 Heavy Anti-Tank SP No.2. In 1958, the British army received Malkara ATGMs on light Humber Hornet cars. The system was much more compact and mobile, making the 183 mm SPG a relic of the past.
After completion of the trials, both FV4005 prototypes were disassembled. The Centurion Mk.3 hulls were used for other programs and the gun systems ended up in training facilities. The turret of the Stage II spent a lot of time in storage near the Bovington Tank Museum, and was only recently installed on a Centurion Mk.8 chassis. Even in this form, it is of great interest, serving as a epitaph for British tank destroyers. The FV4005 Stage II stands near the eastern entrance to the museum. Perhaps someday there will be funding to move it indoors and restore it.


